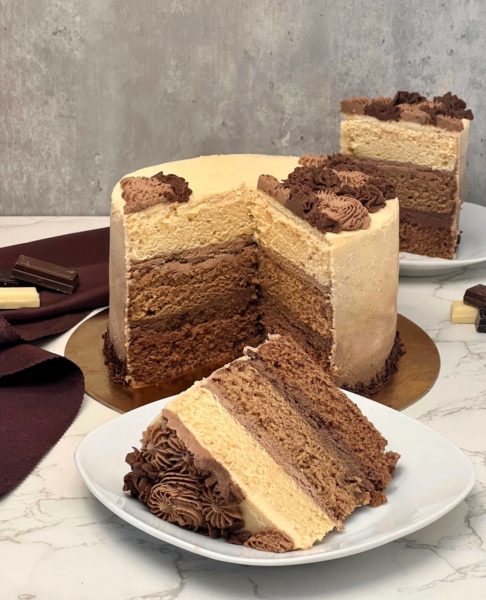
Triple chocolate torte
Course: Cake, DesertsGet ready to embark on a chocolatey adventure with this triple chocolate torte, a delight for both the eyes and the taste buds. This aesthetically pleasing cake boasts three layers of indulgent goodness—beige, light brown, and darker brown. Picture this: sponge cakes filled with luscious white, milk, and dark chocolate, creating a mouthwatering symphony of flavors.
For the health-conscious, fear not! This torte isn’t just a feast for your senses but also mindful of your calorie count. With each layer carefully crafted, it offers a perfect balance of sweetness without going overboard. Think of it as a guilt-free journey through the world of decadent desserts.
Historically, this torte doesn’t have an ancient origin, but it has become a modern classic. Picture it gracing dessert tables at family gatherings and celebrations, a testament to the timeless appeal of chocolate. Unlike forgotten recipes, this triple chocolate torte has stood the test of time, winning hearts one bite at a time.
Now, let’s talk about the health benefits—yes, chocolate can be good for you! Packed with antioxidants, it’s like a superhero for your well-being, fighting off stress and boosting your mood. This torte, with its trio of chocolate layers, delivers not only on taste but also on those subtle health perks.
Picture slicing through the layers, each bite a symphony of textures and flavors. It’s like a culinary masterpiece, a canvas of chocolatey artistry. The white chocolate cream, light and delicate, dances with the rich dark chocolate, creating a harmony that leaves your taste buds applauding.
As you assemble this masterpiece, consider it a labor of love. From the careful preparation of each sponge cake to the meticulous layering of creams, this torte is a celebration of craftsmanship. And when you finally unveil your creation, refrigerated to perfection, it’s a moment of triumph—a reward well worth the wait.
So, why not treat yourself to a slice of this triple chocolate torte? Whether it’s a special occasion or a midweek indulgence, it’s a journey into the world of chocolate that you won’t want to miss.
Ingredients
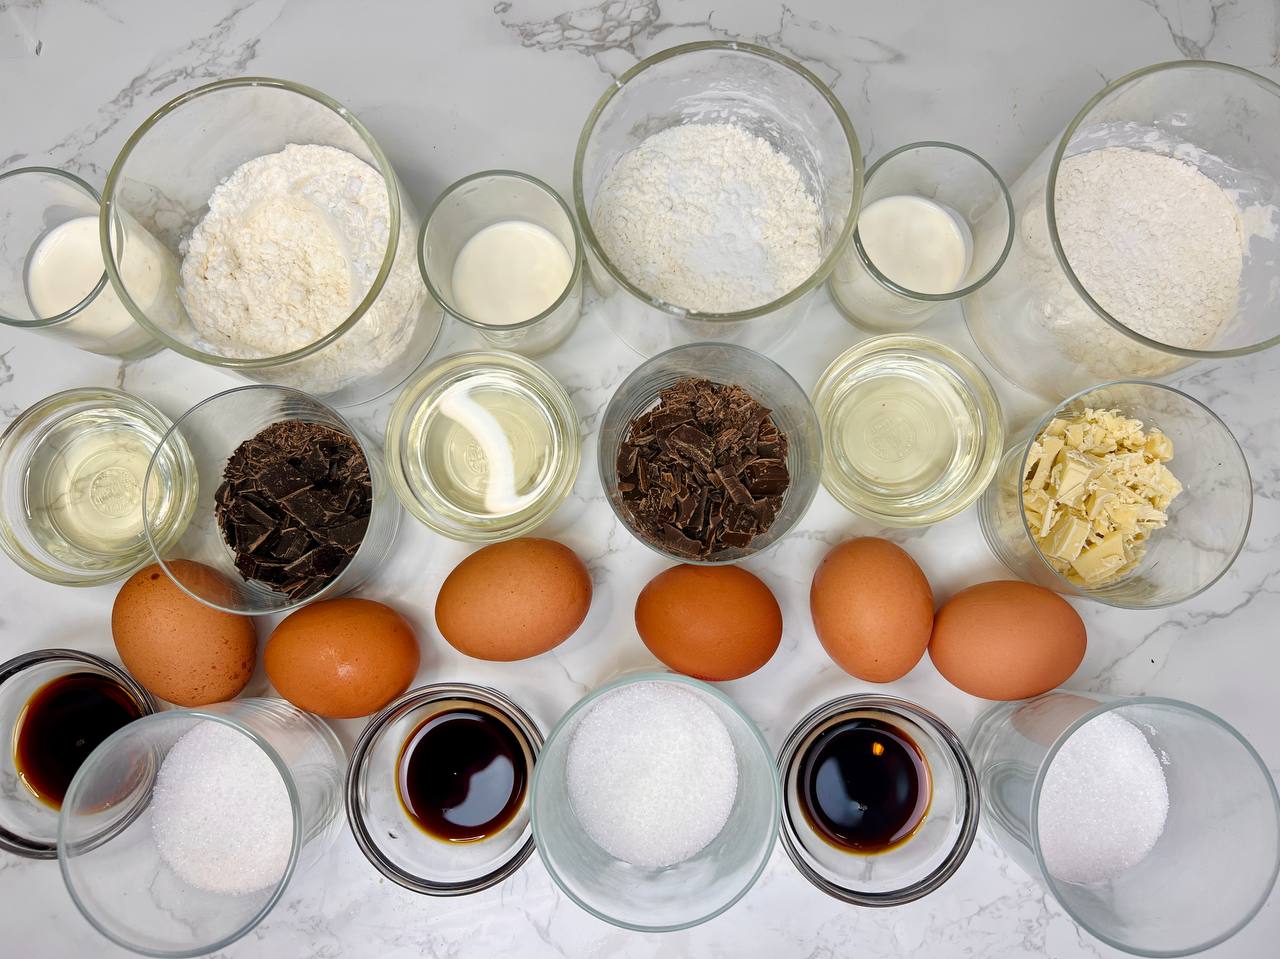
- Ingredients for white chocolate sponge cake
2 eggs
84 g (3 oz) sugar
70 g (2.5 oz) flour
35 ml (1.2 fl oz) cream
40 g (1.43 oz) white chocolate
30 ml (1 fl oz) vegetable oil
30 g (1.07 oz) corn starch
1 tsp baking powder
1 tsp vanilla extract
- Ingredients for milk chocolate sponge cake:
2 eggs
84 g (3 oz) sugar
70 g (2.5 oz) flour
35 ml (1.2 fl oz) cream
40 g (1.43 oz) milk chocolate
30 ml (1 fl oz) vegetable oil
30 g (1.07 oz) corn starch
1 tsp baking powder
1 tsp vanilla extract
- Ingredients for dark chocolate sponge cake:
2 eggs
84 g (3 oz) sugar
70 g (2.5 oz) flour
35 ml (1.2 fl oz) cream
40 g (1.43 oz) dark chocolate
30 ml (1 fl oz) vegetable oil
30 g (1.07 oz) corn starch
1 tsp baking powder
1 tsp vanilla extract

Cream – White chocolate cream125 g (4.5 oz) Mascarpone cheese
125 g (4.5 oz) Cream 30% fat
100 g (3.5 oz) white chocolate
1 tsp vanilla extract
- Cream – Milk chocolate cream
125 g (4.5 oz) Mascarpone cheese
125 g (4.5 oz) Cream 30% fat
100 g (3.5 oz) milk chocolate
1 tsp vanilla extract
- Cream – Dark chocolate cream
125 g (4.5 oz) Mascarpone cheese
125 g (4.5 oz) Cream 30% fat
100 g (3.5 oz) dark chocolate
1 tsp vanilla extract
Directions
- Sponge cakes preparation
- Heat the cream in the microwave until it boils, stir in the white chocolate until the mixture is smooth.

- Separate the whites from the yolks. Add most of the sugar to the bowl with the whites. Add a smaller portion to the yolks in a separate bowl.

- Beat the whites until stiff peaks form. For about 5 minutes.

- Beat the yolks until clear. For about 2 minutes.
- Add vegetable oil, white chocolate with cream and vanilla extract to the yolks in a bowl. Using a spoon or a mixer, stir everything until combined

- Mix the flour, cornstarch and baking powder, then sift the resulting mixture through a sieve into the bowl with the yolks. Using a mixer, combine everything together until smooth.

- At the very end, add the whites to the bowl with the yolks. Gently stir the dough with a spatula from the edges to the center; do not use a mixer at this stage, otherwise the dough will become overworked.

- Now take a cake ring and line the bottom of it with baking paper or foil. Pour the dough into the mold and bake in an oven preheated to 180 degrees C° (350 F) for 30 minutes. Check readiness with a toothpick by piercing the biscuit in the center; the toothpick should come out completely dry

- Let the sponge cake cool slightly, then carefully run a knife around the edges of the ring and remove the sponge cake. Wrap it in cling film and place it in the refrigerator until completely cool.

- To prepare the remaining two sponge cakes (dark and milk chocolate), follow the same steps as for the first sponge, but instead of white chocolate, add milk chocolate and dark chocolate respectively.

- Cream preparation
- Chop the white chocolate into small pieces, the smaller the better, so it melts faster. Also finely chop the dark and milk chocolate.

- Then separately melt white, milk and dark chocolate in a water bath or in the microwave. You need to be very careful with the microwave as the chocolate can burn easily if you overheat it, so a safer option is a water bath. To do this, place the chocolate in a pastry bag and place it in a boiling water for 3 minutes until completely melted. Then cool the chocolate to 30 degrees C° (86 F). It should be slightly cool but still liquid. If you just pour uncooled chocolate into the cream, it will separate and you will lose its homogeneous structure.

- Mix cream with vanilla extract.

- Then add white chocolate. As soon as you add white chocolate to the cream, immediately start mixing it with a mixer, otherwise the chocolate will solidify under the influence of cold cream.

- Mix the cream for about 1 minute at the minimum speed of the mixer. It is very important not to overbeat it because white chocolate cream is very delicate, it tends to lose its structure and become grainy.

- Then add Mascarpone cheese and mix with a mixer until fully combined, for about a minute.

- *following the same instruction above and only changing the chocolate type, prepare the milk and dark chocolate cream variations.
- Assembly
- Take the base on which you will assemble the cake and place a dark chocolate sponge cake first, if you don’t have a special cake base, use a flat plate.

- You can use acetate film and a cake ring for an easier assembly. But if you don’t have any of those, you can still assemble the cake as usual according to the instructions. Spread dark chocolate cream evenly on top of the first sponge cake. Set aside the remaining cream to decorate the cake later.

- Then place the milk chocolate sponge cake on top and press it well so that it sticks tightly to the cream. If you do not use a ring to assemble the cake, press down the sponge cake carefully so that the cream underneath does not start to crawl out around the edges. Cover the milk chocolate sponge with milk chocolate cream. Also set aside the rest of the cream to decorate the cake.

- Lastly, add the white chocolate sponge cake. Press it in well so that it combines with the cream underneath.

- Now apply a thin layer of white cream on top of the cake. We will need the remaining cream to cover the sides.

- Cover the entire cake with white cream. If you want, you can make a gradient of black and milk creams. Or you can just leave the cake white.

- Decorate the cake with the remaining cream if desired. Leave it in the refrigerator to stabilize for at least 4 hours, preferably overnight.

- It is most convenient to prepare this cake in the evening, so that early in the morning you can treat yourself to a piece of cake with freshly brewed coffee